RSS Feed

White Cheddar Popcorn

White Cheddar Popcorn| Licious Food

Welcome to my contribution to the Leftovers Club! Here’s hoping you will enjoy it Aly of Cooking in Stilettos. It’s my favorite snack food and I want to share the love.

Can you believe it September, my most favorite-ist month? This year has flown! Yes, I am still alive and will be turning another year older on Saturday (yay, me). If my Mom happens to be reading this … one word, Amazon … actually three words, Amazon Gift Card.

So essentially life is good. I entered a contest, I made it to the semifinals, and then I lost. Poop. Thank you to all that voted! I’m sure the best person won.

I’m alive and kicking with a roof over my head. Still living la vida loca in Virginia. I have pushed my LA dream back to 2014 for some health care. If you don’t have it … you truly-uly miss it and I wants it. I have also been busy working on taking the next step with this blog. I can’t wait to reveal it and host a little giveaway as thanks; sort of like giving a birthday gift to a lucky reader.

Now on to today’s post (in my Oprah voice) white CHEDDDDAR PopCORRRRRRRN! I love white cheddar popcorn. It’s fantabulous and I could eat it all day, every day. My most favorite white cheddar popcorn is Oogie’s and it’s very hard to find it where I live. I have tried lots and lots of other brands and it’s not as good as Oogie’s. It’s a Debbie Downer moment each time I try another brand that just does not compare. What constitutes a good white cheddar popcorn? It should taste of cheese with a subtle undertones of onion and garlic with a kiss of salt. I’m not big on salty. Salty over powers the cheese and that just blows. What do you do When you can not find your favorite snack? Why you simply make it and surprise it’s quite easy!

Bonus – when you add cheese popcorn to caramel popcorn that is simply freakin’ delicious. Trust me and check out this post I did awhile back … Cheese and Caramel Popcorn, it was an introduction to my love of Oogie’s and the sweet and cheesey delight.

So, the next time you have a movie night make it a white cheddar popcorn night!

Until next time,

White Cheddar Popcorn
A Licious Original Recipe

Ingredients
1 ounce white cheddar powder
1/4 teaspoon onion powder
1/8 teaspoon garlic powder
1/8 teaspoon salt
1/8 teaspoon white pepper
6 cups of popcorn, popped
Olive Oil Spray

Directions
In a small bowl combine white cheddar powder, onion powder, garlic powder, salt, white pepper. Set aside.

Using either a large bowl or in my case a roasting pan, add popped popcorn and coat popcorn with oil. Leave no popcorn dry! I found that the spray help me coat the popcorn evenly and not leave it oily. Next add the cheese mix to the popcorn and toss, toss, toss and toss some more. Then serve to the hungry masses!

{Sponsored Post} #NoBake Chocolate Peanut Butter Pudding

Posted on

Chocolate Peanut Butter Pudding | Licious Food

Full Dislosure: I have been compensated for this post.

At the time of this posting you have 17 more days to enter! Davidson’s Safe Eggs is having a No Bake Contest.

The Grand Prize Winner will receive a prize package including a trip for two to Florida, accommodations for two days and three nights at a luxury resort, a $1,000.00 USD travel stipend, a Calphalon Non-stick 9-Piece Cookware Set, set of 4 Ici Silicone Tools, Chef Giuliano’s cookbook, Hazan Family Favorites, free Safest Choice Eggs for one year and of course, a cooking lesson and delicious meal prepared by Giuliano – all valued at more than $5,000.00 USD. It sounds like a whole lot of awesome!

Your No Bake submission should include a no-bake recipe that uses eggs, (preferably Davidson’s Safest Choice Eggs) as an ingredient and not require any oven cook time. What are Safe Eggs? “Davidson’s Safest Choice® Eggs are pasteurized in their all-natural, gentle water bath pasteurization process to eliminate the risk of Salmonella. The vast majority of eggs sold in grocery stores are NOT pasteurized. Safest Choice™ offers peace of mind when making recipes calling for raw or undercooked eggs, and removes the worry of cross contamination.”

So if you are like me and raw eggs make you leery. Especially when you make items that require eggs that are not cooked. Say for instance; French buttercream, mayonnaise, aoli, meringue, royal icing, marshmallows … you get the idea. Yes, I know in theory that it is perfectly a-ok to eat but the knowing in advance that the eggs are safe since they are pasteurized prior to using makes me a lot less anxious about consumption.

Sidetrack for a moment … marshmallows would make a great no bake entry, just not the ordinary variety.

So get those thinking caps on and be sure to enter – times a wasting! All the rules can be found on Davidson’s Safe Eggs Facebook page.

Today’s posting was to be about awesome Chocolate Peanut Butter Frozen Custard Pops … well I forgot to add the awesome aka as an ingredient so now it’s pudding. Still good and great in my belly – just not custard. I from time to time go on a chocolate peanut butter binge. I am talking eating a bag of Reese’s or Peanut Butter Pie with chocolate topping. What is it about PB & chocolate? Why is it soooo good? Why can’t I stop at one? I know the answer to that question …

The richness of the peanut butter pairs well with the chocolate. It makes for great tasting pudding. It can be eaten alone or try making parfait cups. To make the parfait cups; layer the chocolate peanut butter pudding in between graham cracker crumbles and whip cream. De-lic-ious! You can also use the pudding as a filling for a pie or make your own frozen pudding pops.

Chocolate Peanut Butter Pudding Pop| Licious Food

I am working on some exciting changes for my blog and I hope to reveal all in my next posting!
Until Next Time,

Chocolate Peanut Butter Pudding
Adapted from Taste of Home Homemade Frozen Custard
Makes 4 cups

Ingredients
2 cups 2% milk
1/2 cup plus 2 Tablespoons granulated sugar
2 tablespoons plus 2 teaspoons cornstarch
pinch of salt
2 eggs (Safe Eggs but of course)
3 oz of 60% bittersweet chocolate, chopped
1/3 cup peanut butter, smooth
1 tablespoon vanilla extract

Directions
In a large saucepan, add milk and heat until is scalding (between 175 to 180 F). Stir in the the next three ingredients; sugar, cornstarch and salt. Continue to stir until dissolved.

Temper the eggs with a small amount of the hot liquid before slowly whisking into the milk mixture in the saucepan. Whisk constantly. Continue to cook and stir over low heat until it reaches 160 F and can coat the back of metal spoon or heat proof rubber spatula.

Remove from the heat. Add in chopped chocolate, peanut butter, and vanilla. Whisk until chocolate has melted and both chocolate, peanut butter, and vanilla has been evenly distributed throughout.

Prepare an ice-bath to Cool pudding quickly or if ice-bath. An ice-bath is achieved by placing pan in a bowl of ice water; stirring pudding for at least 2 minutes. Transfer to a large bowl. Cover and refrigerate – be sure to Press plastic wrap onto surface of the pudding. Refrigerate for several hours or overnight before serving.

*** To make pudding pops, after ice-bath pour warm pudding into pop molds and freeze until firm.

Brownies

Posted on

Brownies| Licious FoodToday’s post is about three things that are on my to do list. Brownies, The Leftovers Club, and a cookbook review. I decided to roll it all up in one post. Kaboosh!

First up … BROWNIES. I am searching for the perfect brownie recipe. It’s a noble quest; a worthy quest. Do you have a recipe I should try then be sure to comment below or send me an email. I would love some feedback.

I want the perfect chocolatey chewy with a touch of cakiness. Oh, and don’t forget the shiny top. The perfect brownie has to have a SHINY top! The building block to a brownie a la mode, Turtle Brownie, Cheesecake Brownies …

There a few things I am serious about and that is burgers, cupcakes, and brownies. There are many greats but there are also some duds. There is no joy in Mudville when you experience a sub par burger, cupcake, or brownie. I can’t explain what makes it crapola but your taste buds sure can.

Next, this is my contribution to The Leftovers Club.

I decided to join The Leftovers Club thanks to Kelly at Kelly Bakes. I met Kelly at Eat Write Retreat. She was a fellow volunteer and also extremely cool. She told me about a way to network with fellow bloggers through The Leftovers Club.

I did say I want to practice networking ( I might have just said it to myself) but it is true. I suck at networking. I am an introvert for the most part. If my job did not require that I talk with others then I more than likely would never talk. I give good phone voice in case you are wondering – ha!

Talking to others and DON’T even start with crowds … it can start the flutters and sweats like only anxiety can do. I think the thought of being thought of as lacking or an idiot makes me get all kerfuffley.

Essentially, I need to get out of my head.

I strongly feel the need to connect with other bloggers and pick their creative brains and become inspired. Inspiration is usually found around you or so they say. In order to do that I have to surround.

Lastly, this recipe is from this great cookbook that I picked up about baked goodies!

The cookbook is by Kim Ima and is entitled “The Treats Truck Baking Book: Cookies, Brownies, & Goodies Galore!” It’s a great cookbook and everything I have made thus far has been fantastic … chocolate chip cookies, devil’s food cake, and brownies.

I can’t wait to take on a pie or two. This is great for any baking skill set. The recipes are easy peasy along with ingredients that can be found at your local grocery store. It’s a keeper! I am eyeing the Kitchen Sink Crispy Squares treats for my next session in the kitchen. Did I mention I am suppose to be losing weight?

Want to try this brownie recipe? Head on over to The Daily Meal and make Kim Ima’s delicious Brownies. This is the same recipe featured in the cookbook and I did not make any changes except adding crushed toffee in the middle.

I enjoyed the richness of the brownie and I would say it’s in my Top 5 but alas it’s not the Holy Grail brownie of my dreams.

Until Next Time,

Watermelon Limeade

Posted on

Watermelon Limeade | Licious Food  #Drinks #Beverage  #ThirstyThursdays

It’s THURSDAY, YAYYYYYY!

It’s almost the weekend and it’s time for a new feature on this lovely blog entitled Thirsty Thursdays.

So the plan, my friend, is to feature a drink each Thursday. It can be alcoholic and then again it could be non-alcoholic. Could be cold or hot. It’s Thirsty Thursdays… so who cares?! If it’s a drink then I shall blog about it … on Thursday. Have I said “thirsty” and “Thursday” enough? I think I did.

So what is the first drink for this new and exciting series? Watermelon Limeade. It’s so good that it had to be blogged. It’s been a drink idea that has been churning in my head since I attended the awesomely great, Eat Write Retreat food blogger conference. I was lucky enough to be a volunteer and learned so much. It also made me passionate about blogging again along with validating the thoughts running around in my mind. I am still composing that particular post. So as soon as it’s ready it will be posted on the blog.

Well, at the conference I was introduced to this great tasting sparkling mineral water – Gerolsteiner. Truly marvelous. I don’t like sparkling mineral water. I think it is disgusto. It tastes just blah. Gerolsteiner changed that thought. I actually think I could give up soda … back that up. Yes, I said it, I could actually give up soda if I had Gerolsteiner to drink. I am quite amazed with myself with that revelation.

Another sponsor of Eat Write Retreat was National Watermelon Promotion Board.  I love watermelon.  I could it eat every day.  For realsies.   The entire weekend during the conference I feasted on some of the best watermelon.   It was fantastic!

Now, both of these are amazingly awesome all on it’s own but what if they were combined with the combination of lime. Knock – OUT!

I love a good limeade but I usually head to Sonic to partake.  I never bothered to try and make it and now I think I might be hooked.   It might be my drink of summer 2013.  Fast tip – make sure you have no type of nicks/cuts on your hand when squeezing many acidity limes (or lemons) if using a manual juicer. OUCH!

Until Next Time,

Watermelon Limeade
Adapted from Delilah Winder’s Limeade from Delilah’s Every Day Soul

Makes 3 cups

Ingredients
6 Limes, juiced
2 1/2 cups Sparkling spring water
1 cup watermelon, pureed
1/4 cup hot water
1/2 cup granulated sugar

Directions
Combine hot water and sugar and stir until combined; should resemble a syrup – no sugar crystals should remain.
Juice limes and pour into a pitcher. Add watermelon puree and sugar water aka simple syrup and stir.
Finally add the sparkling spring water, give a slight stir, and then proceed to serve in glass over ice.

Garlic Parmesan Chicken Salad

Posted on

Garlic Parmesan Chicken Salad| Licious Food


Are you a browser in the grocery store? I totally am. I could roam around the store taking a look at this and that. Adding new products to my cart and acting like I have no where to be … which could be because I don’t have anywhere to be. This is your heads up 7Up; if you want to get in and out of a grocery store – don’t take me.

Little known fact: I have been grocery shopping by myself since I have been about 10 or 11. Long story but needless to say I love grocery stores.

Another reason to grocery shop — the potential to meet my Mr. Gosling-Vartan- Walker-Rheon-Reynolds. I am single and not really ready to mingle but I hear from all the 1001 magazine articles that the grocery store is a great place to meet a man. Uh-huh.

Anywho, on one of my excursions I was in my favorite aisle, condiments, and these new sandwich spreads from Hidden Valley Ranch caught my eye. I instantly grabbed the Oven Roasted Garlic Parmesan Sandwich Spread and Dip. The idea was to add it to my burgers to make it sang – which it did.

However, what am I to do with this stuff when not using it for burgers? So the brain starts churning and the idea comes to add some of this goodness to some chicken salad I was making.

It was dang delicious! “DANG DELICIOUS,” I’m telling you! It upped the flavor factor in my chicken salad and had me coming back for seconds, thirds, fourths, and fifths. Yeah, I kind of ate it all in a matter of a day.

I love chicken salad. As you can see with this being the third recipe I have for some type of chicken salad. It’s a great go to dish in the hot months. Great as a sandwich or paired with fruits or topped on a bed of mixed greens. Chicken salad is also simple to make. It’s a 30 minute meal or less with the help of precooked chicken. Grocery store Rotisserie Chicken is my weapon of choice.

By the by, I was not compensated or sponsored by Hidden Valley Ranch for this post. I simply love grocery store browsing and shopping.

Until Next Time,

Garlic Parmesan Chicken Salad
“A Licious Food Original”

Makes 4 cups

Ingredients
4 cups rotisserie chicken breast, finely chopped
1/4 cup green onions/scallions, sliced
1/4 cup Hidden Valley Ranch Oven Roasted Garlic Parmesan Sandwich Spread & Dip
1 tablespoon lemon juice
1 cup mayonnaise
1/4 teaspoon lemon pepper seasoning
Dash of cayenne pepper

Directions
In a medium to large bowl add finely chopped (aka using food processor and pulsing about 10 to 12 times) chicken breast, sliced green onions, HVR Garlic Parmesan spread, lemon juice, mayonnaise, lemon pepper seasoning, and cayenne pepper.

Mix all items together until fully blended/incorporated with a mixing spoon. Wrap bowl and let mixture refrigerate for at least 15 minutes and serve.

The longer you let it refrigerate the better it is … if you can wait that long. Serve chicken salad with your favorite crackers, pita chips, bread, fruit …

Very Berry Strawberry Muffins

Posted on

Strawberry Muffins

I’m not bluffin’ with my (strawberry) muffin(s) — these muffins are delicious! I am not surprised by that fact since the recipe comes from America’s Test Kitchen. Those guys are amazing … I truly don’t think I have ever had a bad outcome using one of their recipes.

I am in a strawberry mood with the season being in full swing. That’s code for watch out for more strawberry recipes like strawberry syrup, strawberry cupcakes, and chocolate covered strawberries. For me strawberry season means it is finally spring even though it does not feel exactly springy today in Virginia. It’s beginning to feel like summer. That’s Virginia for you.

I’m excited for what’s to come and is it just me or is this year just flying? I love that the days are longer and I am hoping to get outside to use my hula hoop.   I also would like to do a day trip around town with my camera.  There are a few things that I want to share with my readers about this city called Richmond before I leave it.  It’s been real, Richmond. I am just excited!!!   I want to introduce a drinks feature to the blog.   I got plans and it’s time to dust them off and start doing and not just looking.

OH, my most fave news of all is that I will be a volunteer at Eat Write Retreat this weekend! While working the events I hope to store some much needed knowledge on making my blog a better blog. This is a great opportunity for me and I hope to share a recap or two in the coming weeks.

Until Next Time,

Very Berry Strawberry Muffins
Adapted from ATK Best Blueberry Muffins

Makes 12 Muffins

Streusel Topping
1 cup brown sugar
1 cup all purpose flour
1/2 cup canola or vege oil
1/4 teaspoon salt

Muffins
2 cups diced strawberries, fresh
1 1/8 cups plus 1 teaspoon granulated sugar
2 1/2 cups all purpose flour
2 1/2 teaspoons baking powder
1 tablespoon salt
2 large eggs
4 tablespoons of butter, melted and cooled.
1/4 cup vegetable oil
3/4 cup sour cream
1/4 cup milk
1 1/2 teaspoons vanilla extract

Directions
Streusel Topping:
In a small bowl mix brown sugar, flour, salt with oil until it resembles a rough crumb. Set aside.

Muffins:

Insert muffin liners into muffin pan or spray muffin pan with nonstick cooking spray. Adjust oven rack to the upper middle position and preheat oven to 425 F.

In a small saucepan add 1 cup strawberries and 1 teaspoon sugar to a simmer over medium high heat. Stirring frequently while mashing the berries. Cook berries until they proceed to breakdown and mixture is thickened. The berry liquid should also reduce to approximately 1/4 cup (about 6 minutes). Remove from heat and pour into a small heat proof bowl to cool to room temperature (10 to 15 minutes).

Sift together flour, baking powder, and salt together into a large bowl and set aside. In a mixing bowl add remaining sugar and eggs, whisking together until incorporated, should be light yellow in color; don’t over mix. Begin to add melted butter and oil in slowly, whisking into the sugar/egg mixture. Once combined begin to whisk in sour cream, milk, and vanilla extract until combined. Using a mixing spoon or rubber spatula fold in sifted dry ingredients and remaining strawberries. DON’T OVERMIX, fold until combined. Batter will not be smooth. This is not cake batter.

Scoop muffin mixture into the muffin pan using a 3 Tablespoon scooper or ice cream scoop. Top wet mix with one teaspoon strawberry reduction. Using a wooden skewer, toothpick, or chopstick swirl the strawberry reduction in a figure 8 movement. Top with 1 teaspoon of streusel.

Bake muffins for approximately 17 to 19 minutes. Be sure to rotate the muffin tin halfway through baking. Remove from oven and allow muffins to cool for 5 minutes in the tin. Remove from tin and let muffins cool for an additional 5 to 7 minutes and serve.

{Sponsored Post} The Sleepy American Sandwich

Posted on

The Sleepy American Sandwich| Licious Food

Pin a Meal. Give a Meal. Throughout April until May 1, Land O Lakes® will donate $1 to Feed America every time someone pins or repins a Land O Lakes recipe on Pinterest. That’s eight meals for a hungry family when you pin a recipe—and eight more every time anyone else repins it. Giving goes viral. Find your favorite Grilled Cheese recipe to pin on Land O Lakes®

It’s Grilled Cheese month, ya’ll!

I am honored to be participating in the Land O Lakes®  #CheeseChatter, 30 Days of Grilled Cheese, for the month of April!

What is it about grilled cheese that is a total comfort? It’s like PB &  J, it soothes the rough edges from my soul. It makes me hum in delight. It’s bread, cheese, and butter. The ooze of cheese as you take your first bite. I am dancing in my chair right now just thinking about it.

So it’s my turn to give my twist on the grilled cheese sandwich. I truly think it has been twisted in every way possible but I am all for giving it the ole college try. So I did.

FUN FACT: Land O Lakes® Deli American Cheese is smooth and delicious, with a melt-in-your-mouth creaminess that makes burgers, sandwiches and snacks irresistible. And of course, it’s a delicious cheese to have on hand when making a classic grilled cheese sandwich during National Grilled Cheese Month.

The Sleepy American?  Yes, the Sleepy American.  Turkey is known to cause sleepiness and since the cheese is American … the Sleepy American was born.

The Sleepy American is the combination of Land O Lakes American cheese, turkey, bacon, oven baked tomatoes drizzled with balsamic and sea salt sandwiched between the thick Texas Toast bread. My “butter” of choice is a honey butter spread to give just a hint of sweetness. As Fergie (of the Black Eye Peas, and not the Duchess) would say, “tasty Tasty!”    This is a great sandwich for when you have those left overs during the holidays.   Or you can simply go to the deli and while picking up Land O Lakes cheese why not get sliced turkey breast, too.

FUN FACT: Did you know Land O Lakes® Cheese is a fave among families? Well it is. You can find America’s favorite cheese is sliced fresh at the deli counter, just how you like it, at a wide variety of grocery retailers and independent delis, primarily on the East Coast. If you are in a rush be sure to look for the pre-sliced packages near your favorite grocers deli section.

So next time you are thinking about making the best dang grill cheese sandwich EVER or that AMAZING cheeseburger; try the top-quality Land O Lakes cheese products located at a deli near you. Land O Lakes® has been producing farm to table products for over 90 years. I totally sound like a commercial there yet it really is the truth – I own it.

Don’t forget if you are a pin-a-holic that if you pin this recipe or any other of the great recipes from 30 Days of Grilled Cheese on Kitchen Play that you will be helping to Feed America. Use that pinning for good and not evil.

Until Next Time,

*Disclosure: This post was sponsored by Land O’Lakes as part of the Kitchen Play Sidecar series. All opinions given are my own.

The Sleepy American Sandwich 
“A Licious Food Original”
Yields: One delicious sandwich that you will not want to share.

Ingredients
2 slices of Texas toast bread
2 slices of Land O Lakes American Cheese
3 strips of bacon, cooked
2 ounces of turkey breast, sliced
4 slices of oven roasted tomatoes

Directions
Oven Roasted Tomatoes
Preheat oven to 250 F. On a parchment lined baking sheet place sliced tomatoes.  Drizzle tomatoes with balsamic vinegar and coarse sea salt.  Bake anywhere from 1-1/2 to 2 hours.  Tomatoes should look shriveled with caramelization on the balsamic vinegar.  Cool and set aside.  You can make the tomatoes a day ahead if you prefer.

Sandwich Assembly 
Heat frying pan/skillet to a medium heat. Butter one side of each slice of bread. On the unbuttered side of bread place one slice of Land O Lakes American Cheese; add bacon, turkey, oven roasted tomatoes, and finally another piece of American Cheese.   Top with an additional bread slice, buttered side up.

Cook each side until nicely browned (to your liking); approximately 3 to 5 minutes on each side.

Remove from the heat, plate, slice in half and serve with your favorite side dish.

Home Field Advantage Wings

Home Field Advantage Wings| Licious FoodI was suppose to post this wing-mazing recipe prior to Superbowl and it didn’t happen.

Take this as a lesson. Don’t. Put. Off. I had planned to compose this post and have it publish on the Friday before the big game but I said, “naah, I can do it in the wee hours of the morn and still accomplish my goal.” Yeah, about that.

FFWD TO NOW: I am just posting this wingtastic recipe due to the putting off and other things. So let’s pretend that Superbowl hasn’t happened and the winner of the game is still TBD. My twitter timeline and instagram feed is not full of how great Beyonce is …yada, yada. Seriously, if they decide to make a Wonder Woman movie and they cast Beyonce as Diana Prince/Wonder Woman. I will be “pised” (if you have ever watched “The Sweetest Thing” you will understand “pised”). She’s a great singer and I will leave it at that.

So back to the Superbowl preparation; you know you want to serve some wing-a-lings. What’s a Superbowl party without those delish fingerlickin’ toe tapping bits of deliciousness?! These wings are double cooked so they can be doubly awesome. Bah-zing!

The sauce is sweet yet tangy. The sauce contains a favorite Trader Joe’s product that I have stumbled across, their Orange Muscat Champagne Vinegar along with some other ingredients that you will reduce in a saucepan.  Another great thing about the sauce is that you can give it another notch of heat on the kick barometer by adding more hot sauce to the mix, if you prefer.

Remember a recipe is simply an outline. You adapt and make changes where you see fit and make it yours.

Until Next Time,


Home Field Advantage Wings

“A Licious Food Original Recipe”

Yields: 12 Wings

Ingredients:

12 Chicken wingettes

2/3 cup Orange Muscat Champagne Vinegar*

2/3 cup water

3 Tablespoons honey

1/4 cup low sodium soy sauce

2 teaspoons garlic, minced

2 teaspoons hot sauce


Directions:

Preheat oven to 375F.

Clean your wingettes and place on a baking sheet.

Bake wings in the oven for 30 minutes.

While your wings are baking start working on your sauce reduction. In a sauce pan add the vinegar, water, honey, soy sauce, garlic, and hot sauce. Cooking at a high heat you are going to reduce the liquids until it’s reduced in size along with resembling a syrup/glaze. It should take about the same amount of time that it takes to cook your wings in the oven.

Remove the sauce from the stove and let cool. Remove wings from the oven and let sit.

Set up your fryer and begin heating your oil to the proper temperature to fry your wings. I set my fryer to 375F.

Using a large ziploc bag pour the cooled sauce into it and set aside. Zip and prop it accordingly so it will not drip. Next fry your wings, I like to fry 4 at a time since my fryer is on the small side, but if you can do 6 at a time go for it. You will fry the wings to a nice golden brown color (about 5 to 7 minutes). You’ll know when to take them out since they will also begin to float to the top. Remove and place on a paper toweled lined plate to drain for about a minute or so.

While the wings are still somewhat hot you are going to want to add them to the ziploc bag and shake until the sauce completely covers the wings. Remove wings from sauce with tongs and plate to serve with your dipping sauce of choice.

*You don’t have a Trader Joe’s or you can’t locate a Orange Muscat Champagne Vinegar then try doing 1/4c orange juice with 1/4 c. champagne vinegar.

“Hail Mary” Bacon Cheese Dip

Hail Mary Bacon Cheese Dip| Licious Food

Another day of blogging?! Holy Shnikes! It’s my favorite day coming up soon and I want to share some yums with you! Original “Licious Food” yums.

My favorite day (ok, one of my many fave days) – Superbowl Sunday, is a day that I will have to work but hopefully you won’t.

I love the Superbowl simply for the parties and usually the half time show. That’s right, I’m here for the food -whoop whoop!

Can you tell I was never sports oriented? I was that girl/kid that was always picked last for EVERYTHING. I excel better at solo types of sports, just a fact, although I was pretty bad ass at volleyball.

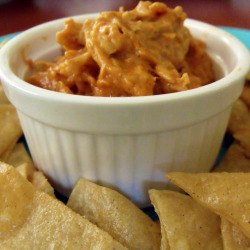
So let me tell you about this dip. It’s the jam. It’s like a loaded baked potato without the potato — that’s why potato chips were invented.

Why is sour cream, cream cheese, bacon, and cheese so magical? I guess it’s one of life’s mysteries.

To get the full impact be sure to make this dip at least a day ahead. The flavors need to meld together.

I bet you can’t have just one chip? 😉

Until Next Time,

Looking for more dips? Check out these previous postings: 

BBQ Chicken Dip

BBQ Chicken Dip

Steak and Cheese Dip

Steak and Cheese Dip

“Hail Mary” Bacon Cheese Dip
“A Licious Food Original Recipe”

 Ingredients
4 oz cheese, extra sharp and crumbled
8 oz sour cream, light
3 oz Cream Cheese, softened
1/2 c bacon crumbles
1 t. bacon rendering (grease)
1/2 t. garlic powder
1t. dried parsley
1/2t. black pepper
1/2t. ranch powder
pinch of cayenne pepper

Directions
The great thing about this dip is that I used my food processor/Ninja to make this particular yum.

Slice bacon into pieces (About 4 to 5 slices) and cook/bake in the oven or atop your stove. Cook bacon to nice and crispy and let cool. Reserve 1 teaspoon of baking grease.

In your food processor/Ninja take the 4 ounces of cheese, cut them into 1/2 inch slices, insert into your processor. You will be using your blades to crumble the cheese. Should resemble crumbles, no one crumb will look the same. Remove the cheese crumbles from the processor into a large bowl.

Next add the sour cream, cream cheese, bacon rendering, and spices into the food processor. Pulse until incorporated, no cream cheese lumps. It might look soupy however when refrigerated it will firm up again.

Pour mixture into the large bowl that contains the cheese crumbles and add the cooled bacon pieces. Fold the cheese and bacon into the sour cream mixture. Cover and Refrigerate for at least 3 hours, however if you can prepare this dip a day ahead then all the better. Let those flavors meld!

Serve with your favorite potato chip (That would be Utz’s Kettle Classics Dark Russet Kettle Chips for me)!

Makes Approximately: 1 and 1/2 cups.

Sponsored Post – LifeSize Portions

LifeSizePortions4| Licious Food2013 is full of new beginnings. One beginning for me is to lose weight.

I was suppose to start this quest before 2013 yet stress and thoughts of losing weight don’t go hand in hand.

I am still stressed but as I get older and I carry all this unnecessary weight I realize if I don’t start this journey into weight loss then I may not be here to talk about my procrastinated stressed out ways … and that truly scares me.

Luckily, I received a product to review entitled LifeSize Portions. It’s a neat little kit. It essentially teaches you how to live in moderation and lets face it …. we don’t live in moderation (typically) but in excess. We want it and we “gets” what we want. You know what I mean and I think you do.

Real talk -I am at my largest and I am not happy. The legs that I use to have no problem showing are in hiding. I now have enough tires around my waist to outfit a small car.

Perfect case in point to illustrate my unhappiness is this video (below) that was taken in March/April of last year. A video shines and never hides. Please don’t pay attention to my crazy faces and lack of rhythm. I am part of the Rhythmless Nation and I think I need to visit LiviRae  since my bra was not helping anything.

Well if you are not happy then you should turn it around.

So I am. It’s not going to be easy but I am going to try my damnedest to get healthy and in a way that I can live with myself.

So let me give you a tour of  LifeSize Portions. Step this way and watch your step.

Like I said earlier, it’s a kit that has all these food measurements and instead of putting items on a scale you use these measurements.

LifeSizePortions4| Licious FoodThere is a measurement for everything INCLUDING dessert. Dessert is not an everyday occurrence; you have to earn that bad boy!

The kit also comes with a wall chart, DVDs, and CDs to help you with understanding the plan and how to build your meals.

LifeSize Portions 3| Licious Food
LifeSize Portions 2| Licious Food
Product Review LifeSize Portions| Licious FoodIt’s an investment in time and in the beginning it seems overwhelming however I feel that going through the LifeSize Portions process will teach me once and for all to eat the right portions. Did I mention the beauty of this process? I can essentially eat what I want. That’s right … I can eat what I want. I am not planning to eat fried food galore and countless French Fries because that’s just not me. What I can do is occasionally treat myself to those treats using LifeSize Portions’ tools as my guide.

I am feeling good about this. I am excited by this. 2013 is here and I will be healthy! If you want to see how it goes with LifeSize Portions in my everyday life then be sure to follow me on Instagram. If you have questions then feel free to leave me a comment or send me an email. I will do my best to answer your questions. This will not be my only post about LifeSize Portions. I plan to do progress reports throughout the year.

My first goal is to lose 10 lbs. Once I lose 10 lbs. I will reward a lucky reader with a prize … that’s right my second ever giveaway!

I am hoping to lose my first 10 lbs. by the end of February. I think that is realistic. My biggest hurdle will be simply meal planning along with eating three meals. I tend to eat once a day and then I snack and drink the wrong things. Bad, bad, habits.

That’s all I have for now. Thanks for your readership. I know I am a stop and go blogger and I am trying to change that (another 2013 goal). I have some plans for this blog but that’s another post at another time.

Until Next Time,

* I received LifeSize Portions to review. I did not receive compensation for this review. This is my honest opinion.